A Revell P-47 "Razorback" Thunderbolt Story
- Mido

- Oct 11, 2021
- 10 min read
There are curious things about models. If a kit is received as a gift, the builder can never disassociate the model from the giver and reason for giving. This Thunderbolt story begins several years ago in Arkansas. That's right, Razorback country. My sister believed, and was certainly correct, that this kit would make a great memento of my visit to see her.
But the story really picks up a year later when I became the uncle to her adorable baby boy. And to that end, what more meaningful gift can a modeler give than the gift of a model?
The Razorback sounded perfect.

Editor's note: Choose your own content! Either continue reading for the plane's background or click here to be taken to the kit and build.
The plane
No other fighter aircraft has been produced by the United States in greater numbers than the P-47 Thunderbolt. By the conclusion of the Second World War, nearly 16,000 took to the skies. With its heavy armor and armament, they proved effective in both air-to-air and air-to-ground mission sets.
Design of the P-47 Thunderbolt began in 1940 with the XP-47B in response to lessons learned from the air war over Europe. By then it was apparent that any new aircraft had to be larger, better armed and armored, and fly higher and faster than anything in the current United States Army Air Corps (USAAC) inventory or in development. Requirements for this new fighter included:
A speed of 400 mph at 25,000 feet
6-8 .50 caliber machine guns
Armored cockpit and self-sealing fuel tanks
Greater than 300 gallons of fuel
However, to say that the design of the Thunderbolt began in 1940 is a gross simplification and ignores a rich aviation history that was unfolding in 1930s Long Island, New York, "The Cradle of Aviation". Therefore, let's begin our understanding of the P-47 design with the Seversky Aircraft Corporation (1931) located in Farmingdale and founded by Major Alexander Seversky, a Russian immigrant and aviation pioneer.
By 1933, Seversky had produced a 3-seat monoplane float plane, the SEV-3. This aircraft featured an all-metal design and a thin semi-elliptical wing. Both of these features would find their way into subsequent Seversky designs. The SEV-3 was also fast and set several speed records for its class.

The design was robust enough that in 1935, when the USAAC held a fighter competition Seversky entered with a modified SEV-3, known as the SEV-2XP. The SEV-2XP featured 2-seats and fixed landing gear. While the SEV-2XP did not win this competition, it emboldened Seversky to design an aircraft that would win the following year's competition. And win they did. In 1936, Seversky submitted their SEV-1XP which featured a redesigned fuselage, tail, and "pod-retractable" landing gear. This capable prototype was declared the competition winner and was subsequently developed into the P-35.


In 1939, global tensions began to boil and corresponding aircraft development reached a fever-pitch. This led to the USAAC to hold yet another fighter competition in which Seversky submitted two designs. The first was the AP-4 which was championed by Major Seversky himself and the second was the XP-41 designed by Seversky's long-time chief engineer, Alexander Kartveli. The AP-4 introduced a turbo-supercharger and as a result attained great high-altitude performance. To incorporate the turbo-supercharger, a large fuselage to house extensive ducting was needed. Conversely, the XP-41 made use of a mechanically driven super charger and achieved less impressive overall performance. Unfortunately for Seversky Aircraft, neither design was selected the competition winner, but as a consolation the USAAC did issue an order for several aircraft based on the AP-4 which would be enhanced and given a new designation, the YP-43.

Editor's note: If you were wondering why two designs were submitted by Seversky, I can only summarize through hindsight that there was a large internal power struggle occurring. My rational derives from the simultaneous expulsion of Major Seversky from his company and its subsequent re-organization into the Republic Aviation Corporation in late 1939.
The YP-43, now being built under Republic, and without Major Seversky, featured two key design changes that would be seen on the later Thunderbolt. First, the long glass cockpit canopy would be refined, through the removal of glass, into what would be called the Razorback fuselage. Second, the engine air intake was moved from the wing root to under the engine which resulted in a loose fitting engine cowling with a distinctive oval shape. As the YP-43 design matured it was designated the P-43 Lancer and some 270 would be produced.

In this fast-evolving age of aviation, Republic sought to improve the P-43 design through their XP-44 "Rocket" program. This program notably incorporated the Pratt & Whitney R-2800 Double Wasp engine, an engine that would go on to power other venerable fighters such as the F6F Hellcat and F4U Corsair.


As the the XP-44 program was being worked on, a simultaneous USAAC request for a light fighter design was being fielded. To this end, Republic submitted their XP-47 and improved XP-47A designs.
Ultimately, neither the XP-44 or XP-47A saw production. The USAAC determined that existing projects would have been inferior to fighters currently being fielded by the German Luftwaffe. And so the XP-47B, progenitor of the P-47 Thunderbolt, was finally born.

At nearly twice the weight of contemporary fighters, the P-47 Thunderbolt was enormous. Drawing from prior Seversky and Republic designs, the Thunderbolt featured:
Elliptical wings (SEV-3)
All metal construction (SEV-3 and later designs)
Retractable landing gear (first seen on the SEV-1XP and P-35)
A turbo-supercharger and requisite wide fuselage (AP-4)
"Razorback" fuselage (YP-43 and P-43)
Chin-mounted air intake with corresponding ovoid cowling (XP-43 and P-43)
P&W R-2800 Double Wasp engine (XP-44)


It was also heavily armed and featured 8 .50 caliber machine guns in the wings along with an armored cockpit and self-sealing fuel tanks. It was, according to chief designer Kartveli, "A dinosaur, but a dinosaur with good proportions".

The XP-47B first flew on May, 6th 1941. By the end of 1942, production P-47Cs were sent to England for their trial by combat with the 56th Fighter group as part of the 8th Air Force. It was here that the aircraft earned its nickname "The Jug" in reference to either 1) the fuselage resembling a milk jug of the era, or 2) it was a juggernaut (yes, I prefer the milk jug version). The operating theater expanded to Italy and even Australia in mid 1943.
Initial operating results were not impressive. Many Thunderbolts were lost to accidents due to hasty in-theater assembly, inexperience with the airframe, and an emerging problem facing premiere fighters of the day called "compressibility". Compressibility is when shockwaves build up along the wing of an aircraft as it approaches the sound barrier which prevents control surfaces from working properly. In some ways, the Thunderbolt was too fast for its own good.


Combat results improved as pilots became more familiar with the Thunderbolt. No adversary fighter could match its ruggedness and firepower. In the Pacific, external fuel tanks were developed to extend the range of the relatively short-legged Thunderbolt. As the war went on, other improvements were incorporated to the overall design such as a "bubble-top" canopy for improved visibility and a paddle-blade propeller for improved rate of climb.
When the Luftwaffe lost air-superiority over Europe, the Thunderbolt was used more and more for ground attack. In this role, Thunderbolt pilot's were happy that their radial engine was able to absorb more damage than in-line engine-equipped fighters like the P-51 Mustang.
Of the 16,000 Thunderbolts produced, 5,200 were lost including 3,500 from combat. The Thunderbolt achieved an aerial kill ratio of 4.6:1. In the European theater alone, they are credited with destroying nearly 7,000 enemy aircraft, half of which were in the air, a combination of 95,000 rail cars and locomotives, and a combination of 75,000 trucks and armored vehicles. Today, the Thunderbolt is remembered as a punishing beast. Nothing says this more than the namesake of Republic's modern day close-air-support aircraft: the A-10 Thunderbolt II.

The kit
Where to start? This is an old kit that can trace its origins back to 1967. And if I play out this narrative, it is conceivable that my father built the kit as a kid. Therefore, it is fitting that I will be building this kit to share with yet another family generation. Cool.
But the kit is also from 1967. If I play out this narrative, that means we are in for a bare-bones cockpit, a "puddle-like" pilot, flash, and all manner of ill-fitting parts. Yikes.
I decided to reconcile these two competing narratives the only way I knew how: building.
The build
This was one of those builds that took a little while before I was able to get solid momentum. In fact, at the start of this build, I had another similarly old kit on the bench (top-secret for now), and my intention was to achieve something akin to economies of scale while painting. Those economies didn't materialize the way I hoped they would, but the concept still interests me and I will try again.
I was able to get going once I focused solely on this kit. Here are a few photos with bare plastic and a non-comprehensive set of notes.


First up is the cockpit. Not too much going on in there by today's standards (remember that 1967 thing). But I will point out some victories. The instrument panel has been entirely painted by hand and dials were created using a fine point pen. I was also able to add wear and tear on the seat, and while you cannot see it in the photo too clearly, a wash was applied to add some depth. I will also point out the white putty (grrrrrr) that runs down the fuselage spine.
Next up is the underside where putty is clearly visible along the wing roots and into the landing gear bays. It is a shame that I painted these and the cockpit prior to assembly. I thought I could get away with it. I was wrong, and the work would need to be redone. There is also a solid bead of putty down the middle of the fuselage. Furthermore, nearly all the panel lines were misaligned and had to be carefully corrected with knife work and tons of sanding. Note the "Copyright Revell Inc 1967 CHINA" impression on the horizontal stabilizer to the left (tail). Purists would sand that off. I happen to love it for this build!
Finally we have a view from above. Those pesky wing roots and horizontal stabilizers all required putty. While not seen, the leading and trailing edges of the wings also required plenty of knife work and sanding to get the upper and lower halves to align.
I had a two thoughts after all this cutting, filling, and sanding:
The little booger better appreciate all this work one day (if he doesn't first throw the plane thinking it will fly. The horror!)
Panel scribing and creating rivets. These are things and people do them. Future-me is intrigued by this, but I digress.
Painting...
This build was more about sentiment than it was about historical accuracy. For a little bit of fun, I decided to paint the Razorback in colors that mimic the likeness of my nephew's family dog. He is strong, rugged, and adored by those who know how to handle him. Sounds just like a P-47 to me. Woof! Woof!
Below you can see some of the painting steps. Due to all the kit fit issues and necessary bodywork, a primer was an absolute must and in this case I used Vallejo's Surface Primer. Adding a primer achieves three things. First, it will allow subsequent paint to adhere better, second it will bring the model to a common color, and third, it will reveal any imperfections in the build that will need to be tidied up (there were a few!)


Next I pre-shaded the panel lines with Tamiya's Dark Grey. What you see in the second photo is a Silly Putty mask that demarked a soft edge line between a cream-colored underside and a golden-brown topside.
The third photo shows the masking of a paranoid modeler concerned with overspray. As I thought about it, I wanted the nose of the Razorback black, just like the dog's nose.
...Painting
When you set out to build an airplane, major tasks like building and painting the cockpit, engine, and landing gear are baked into your expectations. These are core components of the aircraft and you know that they must be handled with care. But there are less obvious tasks too.
For example, masking a canopy can be extremely tedious and time consuming. Something seemingly simple like a propeller can have several "warning" colors on each blade that need to be masked and painted in the correct order (light to dark is my preference). Then there are the munitions which can be treated as their own individual models. Here are a couple of photos of the work that goes into the smaller tasks and what a tantalizingly-close-but-yet-so-far-from-finished model looks like.


That third photo above shows the armament still as bare plastic. Because this build is for a newborn, I questioned the wisdom of gifting a plane with weapons. In the end, I finished them and hung them on their pylons. I reasoned that if my first childhood build at age 5 (under the supervision of my father) had them, then so should his. Said differently, I turned out fine. Right?
Finishing
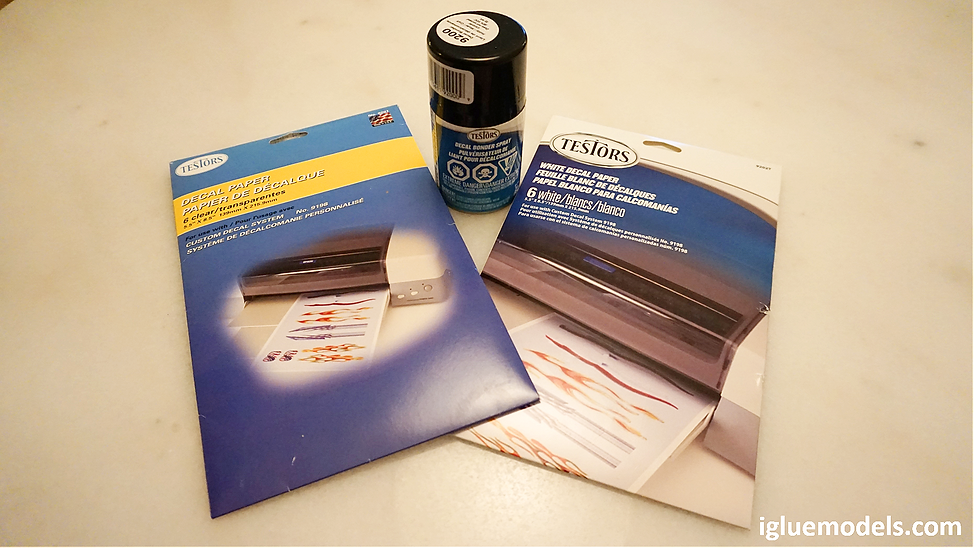
From the onset, I knew that I wanted to do something special with decals. Lucky for me, the kit already had an awesome set of different markings. One of the markings was for a Razorback called "The Bug" and it included a pair of eyes and a mouth with razor-sharp teeth. I thought these would be perfect to go along with the dog-inspired paint job.
But I didn't want to stop there. So I went ahead and made custom decals in the likeness of my nephew and his doggo-older-brother to be featured on the left and right sides of the fuselage.
Editor's note: Decals have been blurred for privacy reasons.


Once the decals were laid down I applied several colors from Tamiya's Panel Line Accent Color range. I tried something a little different where I combined aspects of a pin wash along with a dot filter to give some localized streaking effects. I think the end result looks nice and might be something to try again.
The landing gear, in addition to panel lining, also received a mineral spirit pigment slurry. A dusty look can be achieved by wiping away the excess pigments after the slurry has dried.
Transporting
Disclaimer: I've never tried to transport a model across long distances (how else is a gift going to get where it needs gifting). I was terrified of what might happen to the build. I arrived at a solution where I would use copious amounts of tape and bubble wrap to isolate the plane inside of its future display case.

Alright, alright, stop laughing, I know it looks ridiculous!
Final thoughts
This was the first build that I intended to gift someone and even though the recipient is too young to know what an airplane is. I felt it was imperative to get the details right and build the best model I could. I also found myself tinkering a lot more than I usually do during the finishing stages. The only thing that stopped me was my travel "deadline"!
In the end, I am very happy with this build and one day I hope my little nephew will be too! Better yet, maybe one day I will be very happy, no, ecstatic at what he builds for me!


Thanks for reading,
Mido
Contact the author: mido@igluemodels.com or on IG @igluemodels
Notes and sources


Comments