How to Make Your Own Decals
- Mido

- Oct 12, 2020
- 5 min read
In my previous decal post I covered everything you needed to know about stock water slide decals and how to work with them. But what if the included decals in the kit weren't what you were looking for, if they were included at all? Maybe you want something special? Personal even?
Well, you are in luck! Several companies produce water slide decal systems that work with inkjet printers. In this post I will share with you what I have learned from using one such system and take you on the journey from ideation to implementation.
The system
The system I am familiar with is produced by Testors. The basic concept is to print your decal design on either white or clear decal paper, let it dry, spray on the decal bonder to create the carrier film, let that dry, and then apply the decals to your model.
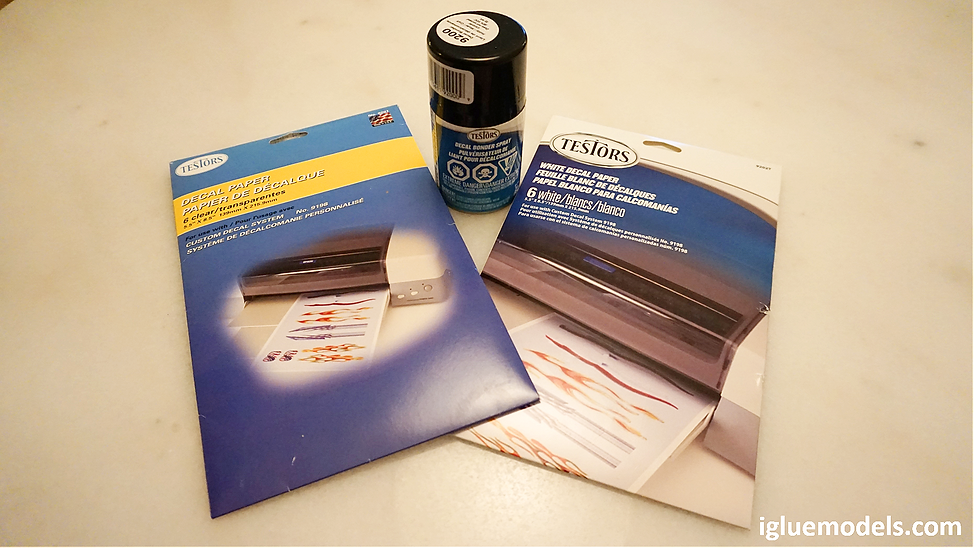
Before we jump into the "how to" part of this post, let me clear up a few things about the paper. Unlike professional silk screen presses that create most hobby kit decals, chances are your printer won't be able to print white. Therefore, a white decal paper is available to "cheat". Also, lighter colors may appear transparent when printed on clear paper. In these cases, printing on white may be advantageous.
While the white paper gets two check marks, there is a big downside: it's white paper. Meaning, you need to be extremely careful in cutting out your finished decal as close to the image as possible so the white outline is removed. In some cases, this is not easy. Trust me.
Ideation (I have been told that is a word)
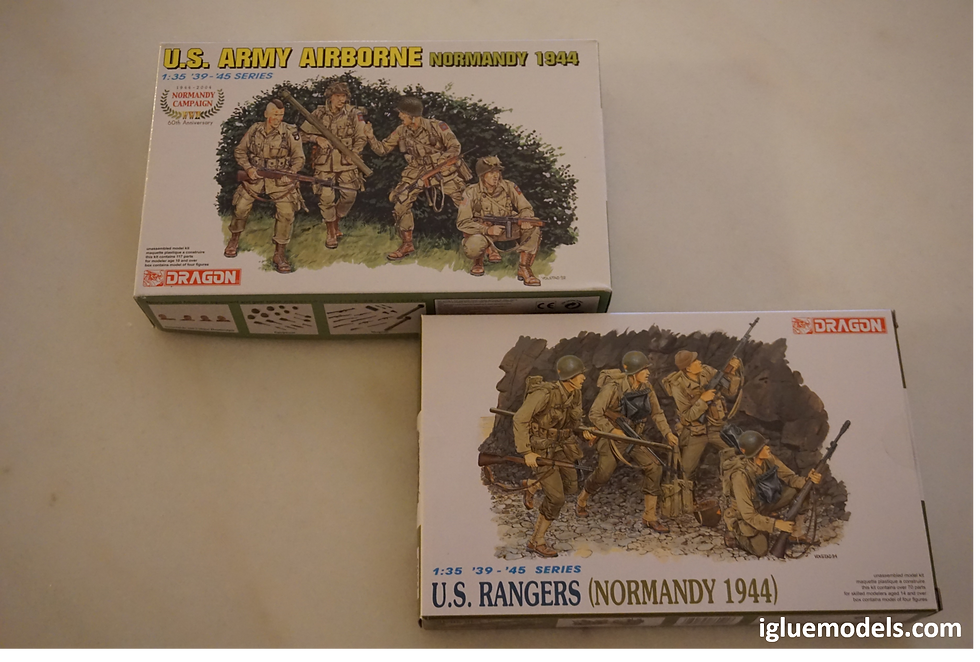
For this post, let's stick to something simple: uniform patches for Dragon's 1/35 scale U.S. Army Airborne (Normandy 1944) and U.S. Rangers (Normandy 1944). Neither of these kits came with decals representing unit markings or rankings but I have a feeling that making my own will go a long way towards adding historical context and making these figures pop.
For the U.S. Army Airborne, I plan to make a diorama that depicts the American parachute drops of Operation Overlord in Normandy, France on the night of June 5th-6th. The drops were chaotic and elements of the 82nd Airborne Division and 101st Airborne Division were scattered about the countryside. I can point towards the chaos they faced by representing soldiers from these two different divisions acting as a single squad.
The U.S. Rangers will be the subject of a separate Operation Overlord diorama that depicts their scaling of the 100' cliff at Pointe du Hoc while under fire. This strategic lookout was fortified as part of Germany's Atlantic Wall and was believed to contain 6 captured French guns overlooking the Normandy beaches. For the June 6th beach landings to be a success, these guns had to be neutralized.
Setting up your decal file
Step 1: Find an image, or create your own of the unit patch you need and bring it into Microsoft PowerPoint. Other software will work just fine, but this is what I am familiar with.
Step 2: Scale the image so it prints at the correct physical size. A unit patch might be 2"x3" in real life, which dividing by 35 (the scale of the figures) works out to a physical print of .057"x.086". Yes, tiny! Will anybody even see this hard work?
Step 3: Copy the correctly sized image and create up-scaled and down-scaled versions in increments of 10%. The simple truth is that you don't know how the decal will end up looking on your model until you actually put it on the model. Part of this hobby is an art and it is best to have a few size options to work with. Trust me, nobody will know if your unit patch is off by a little.
Step 4: Copy the differently sized patches a few times over. You will want to have plenty of backups. Just be sure to space out all the patches so you have room to cut them out as needed.
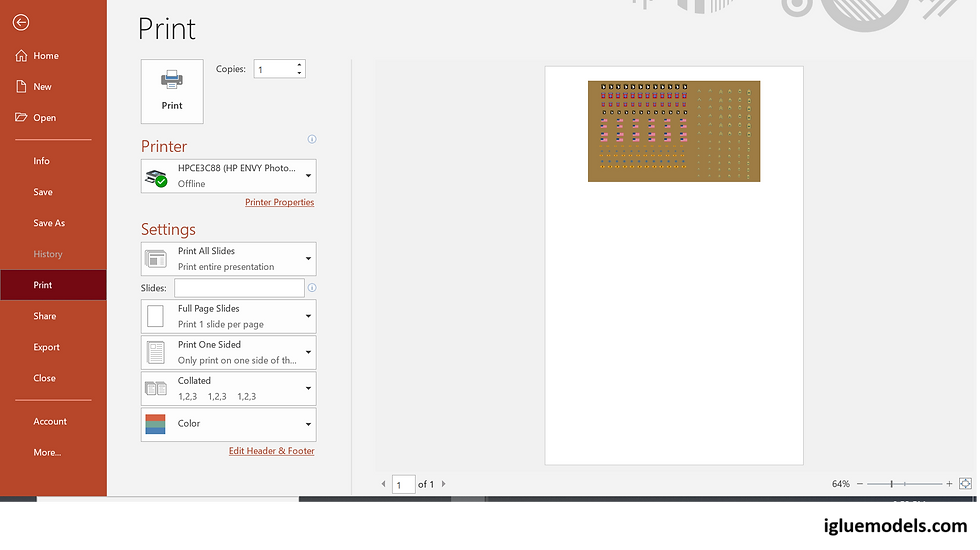
Step 5: Depending on the coloring of the image, we might be forced to print it on the white paper. If that is the case, I have found it helpful to add a background color (approximating the uniform color) beneath the decals to be printed. This serves as a transition border between your desired decal image and the model itself. Otherwise you will have a solid line of white decal paper from not trimming your decal close enough, or a "shaved in places" decal from trimming too close. Your PowerPoint should now look something like this:

How to avoid calling Peter, Samir, and Michael on your printer
Even though it is 2020, printers still give us grief and with decal paper being hard to find and expensive when you do find it, it's best to get things printed out correctly on a test piece of paper first. Once everything checks out, you will be able to "flip the switch" to production. To put you on the path to printing success, here are my settings (yours may need to be adjusted) for both testing and production:
Printer: HP ENVY Photo 7155
From within PowerPoint 2016
Set the slide size: Design --> Slide Size --> Custom Slide Size
Width = 5.5"
Height = 8.5"
Portrait
Create a custom size paper: Print --> Printer Properties --> Paper Quality --> Custom
Width = 5.5"
Height = 8.5"
Name it "Decal"
Set the printer settings: Print --> Printer Properties --> Paper Quality
Paper Size = Decal
Paper Source = Main Tray
Paper Type= Plain Paper / Other Glossy Inkjet Papers
Borderless Printing = Off (but can be left On)
Print Quality = Normal / Best
Print in Grayscale = Black Ink Only / Off
Test Paper: Cut the regular 8.5" x 11" paper down to size.
Paper placement: Face down, the long way, with the front going into the machine.
Although you have a head start on the print settings, you might still find that adjustments need to be made. That is why it's important to get things as final as they can be with the test paper. And even with all the planning, decal paper is thick so paper jams might be more common. Before I send the decal paper through, I try to flex (not crease!) the paper to "condition" it for the unforgiving printer rollers. It is worth noting that my printer feeds from the horizontal position and that jams may be reduced by using a drop feed printer.
A final tip about printing: You will notice that I did not place my graphic in the middle of the page. Decal paper is expensive, there is no reason we can't use the remaining paper for another print job.
The decal bonder
Once the decals have been printed out, let them dry for 48-hours. When they are dry I cut off the portion of the decal paper with the decals-to-be (remember we can save the remaining paper), and I use blue painter's tape to secure it to a piece of cardboard.

Before applying the decal bonder make sure to pay attention to the hazard warnings and instructions on the can before use! I wear a respirator because this stuff is smelly!
I apply the bonder from the recommended distance of 10-12 inches from the work and first spray in a left/right motion and then once more in an up/down motion.
Now just be careful not to touch the work and try to protect it from dust as it dries. Give the decals another 48-hours to dry before applying to the model.
Final thoughts
After reading this post I hope you come away with a belief that you too can make your own decals and an excitement to try. They are a great way to give an extra kick to an existing kit or to make something unique.

So what are you waiting for? Start thinking outside the box and push yourself that little bit further than you thought you could go! I think you'll be pleasantly surprised by the results; I know I've been.
Time to let the decals dry!
Thanks for reading,
Mido
Contact the author: mido@igluemodels.com


Comments